4 of 18 pages shown in full. The rest are in the download.
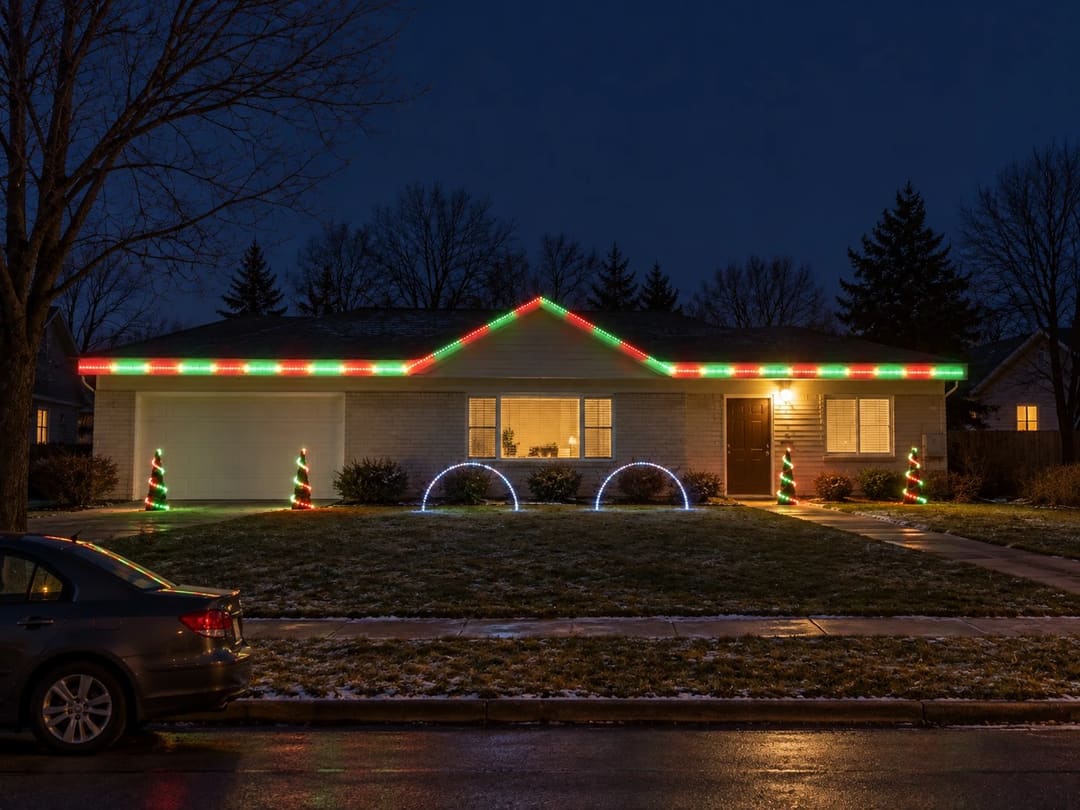
You have seen the houses where the lights dance to music on the car radio. This guide walks a first-timer through building one: color-changing pixel lights along the roofline, four mini trees and two arches, run by one controller and a small player, with the music on an FM station. No coding. It teaches exactly enough xLights to make it dance, and nothing more.
It is written around one concrete starter show so every step has a real target, with a one-line worksheet to resize it to your own roof.
Look inside
What you get
- The guide, 18 pages (PDF): how a light show works, the words you will hear, the starter show with its port plan, a shopping list with prices (about $1,180 all in), 10 illustrated steps, a fix-it table, and a safety and next-year page
- An xLights starter show folder (ZIP): the nine props already set up on their controller ports, with the groups a bought sequence maps onto, so your first xLights session is dragging shapes onto a photo of your house
| File | Size |
|---|---|
| Build-Your-Own-Light-Show-Guide.pdfBuild Your Own Light Show Guide, 18 pages (PDF) | 1.2 MB |
| xLights-Starter-Show-Folder.zipxLights Starter Show Folder (ZIP) | 2 KB |
What you need
No laser, router or cutting machine needed.
Skill level
First-timer. A drill, zip ties, a ladder and following a web page. One mains connection inside the power supply, explained step by step, or buy the box pre-wired from a pixel vendor.
The starter show
- 600 twelve-volt bullet pixels: 75 ft of roofline in three 100-pixel runs, four tomato-cage mini trees, two PEX arches
- One Falcon F16V5 controller, one 12 V supply, brightness set once so no run needs power injection
- A Raspberry Pi running the free Falcon Player (FPP) indoors by your router, one Ethernet cable to the show box, an FM transmitter on the headphone jack
- Every plug is xConnect, so everything you order mates
The 10 steps
- 1 Measure your roof and plan
- 2 Build the arches
- 3 Build the mini trees
- 4 Put the lights on the roof
- 5 Build the show box
- 6 Plug in the props and test every port
- 7 Install xLights and open the starter show
- 8 Put your house in the layout and upload
- 9 Get a sequence (buy and map, or make a simple one)
- 10 Set up the player and press play
Printing
- Sized for US Letter paper (8.5 × 11 in).
- Print templates at 100%, also called actual size, and check the 4 in bar before you cut.
- Measurements are in inches.
Good to know
- Software, hardware and prices change. Screen names are from the current xLights manual and FPP; check the makers' sites for the latest versions. The xLights starter folder is provided as a starting point; open it in xLights and adjust it to your house.
- Digital files cannot be returned. If a file is faulty, it is fixed or refunded; see the refund policy.
- For personal use only. Please do not resell or share the guide.
Stuck on a step? Email hello@craftbooklet.com and I will help.
Reviews
No reviews yet. Buyers get an email two weeks after purchase asking how it went.
Stars are never edited or removed for being low. Words and photos are checked for personal details and abuse before they appear.
Questions
Is anything shipped?
No. You buy a PDF booklet (and for machine projects, the cut files). Nothing is posted to you. The download links appear the moment you pay and are emailed to you as well.
Are the pictures photographs of a finished project?
No. They are rendered previews made from the same design as the plans. Your finished project will vary with your materials, paint and yarn.
Can I print it at home?
Yes. Every booklet is sized for US Letter paper. Print templates at 100% (actual size) and check the 4 in scale bar on the page before you cut.
I lost my download. Can I get it again?
Yes. Your links never expire. Use My library to get a sign-in link by email, or reply to your order email.
What if the file is wrong or will not open?
Email me and I will fix it or refund you. Because these are downloads there are no returns otherwise.