4 of 14 pages shown in full. The rest are in the download.
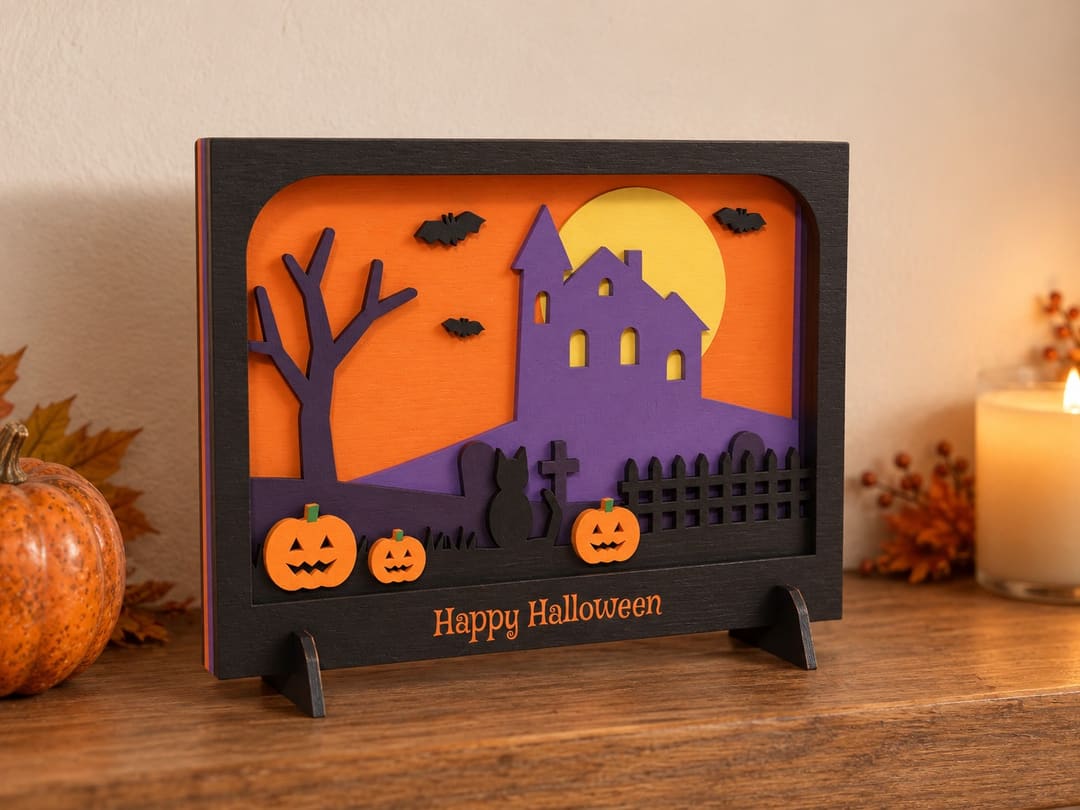
Make a layered Halloween scene from five sheets of thin plywood. A purple haunted house stands on a hill in front of a yellow moon, with a bare tree, gravestones, a black cat by a fence, three jack-o'-lanterns and three bats. Each layer is painted a different color and glued on top of the last, inside a black frame lettered "Happy Halloween". The finished scene stands on a shelf or mantel in two slotted feet.
Look inside
What you get
You download two files: the PDF, and a zip that holds the six SVG files and a copy of the PDF.
- 6 laser files (SVG): one for each of the five layers, plus one sheet of small parts (three pumpkins, three bats and two feet)
- Plan booklet, 14 pages (PDF): shopping list, parts list and 9 illustrated steps for cutting, painting and gluing
| File | Size |
|---|---|
| Haunted-Hill-Layered-Scene-Plans.pdfHaunted Hill Layered Scene Plans, 14 pages (PDF) | 842 KB |
| Haunted-Hill-Layered-Scene-Laser-Files.zipHaunted Hill Layered Scene Laser Files (ZIP) | 666 KB |
What you need
You need a laser cutter that cuts ⅛ in plywood, with a bed of at least 8 × 6 in.
Materials and supplies
- A laser cutter that cuts ⅛ in (3 mm) plywood, with a bed of at least 8 × 6 in
- Wood glue, small paint brushes and sandpaper
Skill level
Beginner, if you already know how to run your laser.
Finished size
- 8 in wide and 6 in tall, ⅝ in deep
- 6⅜ in tall standing on its feet
Materials
- Five pieces of ⅛ in (3 mm) plywood, each at least 8¼ × 6¼ in
- One more piece of the same plywood, about 7 × 3 in, for the small parts
- Six craft paints (orange, yellow, purple, dark plum, black and green) and an orange paint pen. The full list is in the booklet.
Files
- Every layer file is 8 × 6 in at full size. Measurements are in inches.
- Red hairlines are cut lines and black filled areas are engraving. The two are on separate named layers, so your laser software can give each its own setting.
- The feet have a ⅝ in slot for five layers of ⅛ in plywood. If your plywood is thicker or thinner, change the slot width before you cut; step 1 of the booklet shows how to check.
- The plans are sized for US Letter paper.
Printing
- Sized for US Letter paper (8.5 × 11 in).
- Print templates at 100%, also called actual size, and check the 4 in bar before you cut.
- Measurements are in inches.
Good to know
- Your finished piece will vary with your plywood and paint.
- Laser settings (power and speed) depend on your machine, so the files leave those to you. Run a small test cut first.
- Digital files cannot be returned. If a file is faulty, it is fixed or refunded; see the refund policy.
- For personal use only. Please do not resell or share the files.
Stuck on a step? Email hello@craftbooklet.com and I will help.
Reviews
No reviews yet. Buyers get an email two weeks after purchase asking how it went.
Stars are never edited or removed for being low. Words and photos are checked for personal details and abuse before they appear.
Questions
Is anything shipped?
No. You buy a PDF booklet (and for machine projects, the cut files). Nothing is posted to you. The download links appear the moment you pay and are emailed to you as well.
Are the pictures photographs of a finished project?
No. They are rendered previews made from the same design as the plans. Your finished project will vary with your materials, paint and yarn.
Can I print it at home?
Yes. Every booklet is sized for US Letter paper. Print templates at 100% (actual size) and check the 4 in scale bar on the page before you cut.
I lost my download. Can I get it again?
Yes. Your links never expire. Use My library to get a sign-in link by email, or reply to your order email.
What if the file is wrong or will not open?
Email me and I will fix it or refund you. Because these are downloads there are no returns otherwise.